How to Solve a Rubik’s Cube: Easy 7-Step Guide for Beginners
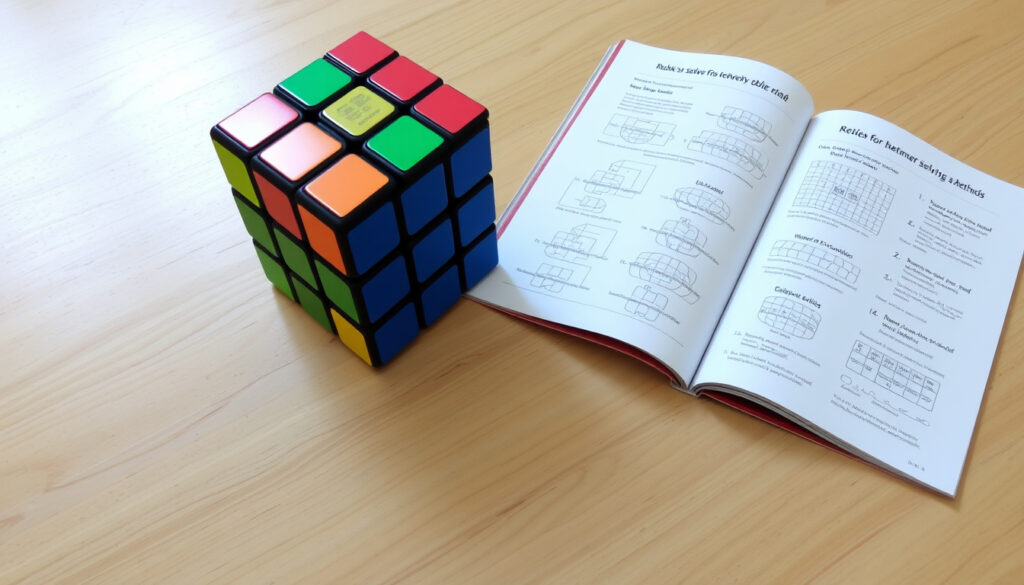
If you’ve ever twisted a 3×3 cube hoping for a lucky break, you already know the feeling of staring at a jumble of colors that refuses to cooperate. The good news is that with just two core algorithms and a seven-step method from the official Rubik’s guide and SolveTheCube, anyone can learn to solve it consistently, and this guide breaks down each layer to show exactly what to do when you get stuck.
Approximate moves in a standard solve: 50‑70 · World record single solve (2023): 3.13 seconds · Estimated number of positions: 43 quintillion · Steps in the beginner’s method: 7
Quick snapshot
- The standard beginner method is the Layer‑by‑Layer (LBL) approach (SpeedCube.us (cubing tutorial site)).
- A common beginner sequence includes first‑layer cross, first‑layer corners, second layer, third‑layer cross, and third‑layer corners (SpeedCube.us (cubing tutorial site)).
- Exact move count varies by solver speed and recognition – not every solver follows the exact same sequence of moves (Ruwix (cubing algorithm resource)). (YouTube tutorial (Best Method 2026))
- Some tutorials suggest a daisy pattern for the white cross, while others recommend a direct cross (YouTube tutorial (Best Method 2026)).
- The method progresses: white cross → white corners → middle‑layer edges → yellow cross → yellow edge permutation → corner positioning → corner orientation (Rubik’s Official (puzzle manufacturer)).
- After mastering the beginner method, solvers often move to advanced techniques such as CFOP, Roux, or ZZ, which reduce move count and increase speed (SpeedCube.us (cubing tutorial site)).
Six key facts stand out from the major tutorial sources, one pattern: the entire beginner method rests on a single pair of algorithms applied layer by layer.
| Fact | Detail | Source |
|---|---|---|
| Approach | Layer‑by‑Layer (LBL) | SpeedCube.us (cubing tutorial site) |
| Number of steps | 7 | SolveTheCube (beginner tutorial site) |
| Core algorithm 1 | R U R’ U’ (righty) | Cubelelo (cubing equipment retailer) |
| Core algorithm 2 from same move family used for edge insertion | U R U’ R’ (lefty) | Derived from the same family of moves; used for edge insertion |
| First step | White cross – align white edge with center colors | Cubelelo (cubing equipment retailer) |
| Last step | Orient yellow corners by repeating corner algorithm without rotating the cube | Cube Academy (online cubing course) |
The beauty of this method is that you only need to learn two short sequences – the righty and lefty algorithms. Everything else is just repeating them in the right place at the right time.
How to solve a Rubik’s cube step by step?
Step 1: Solve the white cross
Hold the cube with white center on top. Find the white‑green edge piece and move it so the green matches the green center, then flip it to the top. Repeat for each white edge. The goal is a white cross with each side matching its center.
SpeedCube.us instructs to keep the white center on top and the green center facing front for the most common orientation setup (SpeedCube.us (cubing tutorial site)). Some beginners find a “daisy” pattern helpful first, but the direct cross is faster.
Step 2: Complete the white corners
Turn the bottom layer to place a white corner under its target position. Apply the righty algorithm R U R’ U’ until the corner is solved. Do not rotate the whole cube – turn only the bottom layer between corners (YouTube tutorial (Best Method 2026)). This step fills the entire white face.
If you rotate the whole cube while inserting corners, you’ll lose track of your reference. Keep the white face up and spin only the bottom layer – it’s slower at first but builds muscle memory faster.
Step 3: Solve the middle layer edges
Look for edge pieces on the top layer that have no yellow. Match them to a side center, then use the lefty or righty algorithm to insert them into the middle layer. The second layer is commonly solved by inserting non‑white, non‑yellow edge pieces (Cubelelo (cubing equipment retailer)). Repeat for all four edges.
Step 4: Create the yellow cross
Now work only on the yellow face. Use the algorithm F R U R’ U’ F’ repeatedly until you get a yellow cross. If you see a dot, do the algorithm once to get an “L” shape, then once more for a line, then once for the cross (Ruwix (cubing algorithm resource)).
Step 5: Swap yellow edges
Use a U‑perm style algorithm (commonly R U R’ U R U2 R’ U’) to rotate the yellow edges into correct positions. Position the solved edge at the back before applying the algorithm (Cubelelo (cubing equipment retailer)).
Step 6: Position yellow corners
Hold an unsolved corner in the bottom‑right of the top face and run the righty algorithm until that corner is solved (Cube Academy (online cubing course)). Then move the next unsolved corner into that same spot – do not rotate the cube. Repeat for all four corners.
Step 7: Orient yellow corners
Use the same righty algorithm again, keeping the cube in the same orientation. Turn only the top layer to bring each unfinished corner into the working position (SolveTheCube (beginner tutorial site)). When all corners are oriented, the cube is solved.
How to solve a 3×3 cube easily?
Why the beginner’s method is easiest for newcomers
Almost all beginner guides recommend the layer‑by‑layer method because it divides the puzzle into small, repeatable goals (Ruwix (cubing algorithm resource)). You only need to memorize about six or seven moves for the core algorithms, and the visual feedback is immediate – each step completes a part of the cube.
Two key algorithms to learn: the righty and lefty algorithms
The righty algorithm is R U R’ U’ (move right face up, top face right, right face down, top face left). Its mirror, the lefty algorithm L’ U’ L U, handles cases on the left side. Cubelelo highlights R U R’ U’ as a standard corner‑insertion algorithm (Cubelelo (cubing equipment retailer)). With just those two sequences you can solve the entire cube – no other algorithms required.
That’s the real secret: a 3×3 cube looks chaotic, but it yields to a single repeating pattern. Once you internalise the righty and lefty moves, you can solve any scramble without looking up a cheat sheet.
The implication for learners: focus your practice time on recognising when to apply the righty vs. the lefty, not on memorising a dozen different sequences. This is what makes the beginner method truly “easy.”
What are the 7 steps to solving a Rubik’s cube?
Step breakdown from SolveTheCube and Rubik’s official guide
Both SolveTheCube and the official Rubik’s brand guide present the same sequence: (1) white cross, (2) white corners, (3) middle layer edges, (4) yellow cross, (5) yellow edge permutation, (6) corner positioning, (7) corner orientation. This seven‑step framework is the most widely taught method on cubing tutorial sites (SolveTheCube (beginner tutorial site); Rubik’s Official (puzzle manufacturer)).
Common mistakes in step 4 and step 6
Ruwix notes that during the yellow‑cross stage (step 4), a common error is not turning the top layer to form the correct “L” shape before applying the algorithm – doing so can add unnecessary repetitions (Ruwix (cubing algorithm resource)). In step 6, Cube Academy explicitly warns against rotating the whole cube between corners, which breaks the reference orientation (Cube Academy (online cubing course)).
The catch: many learners rush step 4 and end up with a misaligned cross, forcing them to restart the yellow layer. Taking an extra moment to align the “L” shape saves time overall.
The pattern: the method is standard, but individual solve times can vary depending on how well a solver avoids these pitfalls.
Step‑by‑step quick reference
- White cross – align white edges with center colors.
- White corners – use R U R’ U’ (righty) on each corner.
- Middle edges – insert non‑yellow edges using lefty/righty.
- Yellow cross – apply F R U R’ U’ F’ until cross appears.
- Swap yellow edges – U‑perm algorithm with solved edge at back.
- Position corners – righty algorithm on each unsolved corner, top‑layer only.
- Orient corners – repeat righty on each corner without rotating the cube.
Every step is documented in the official Rubik’s solution guide and reinforced by tutorials on SolveTheCube (SolveTheCube (beginner tutorial site)).
What we know for sure and what’s still uncertain
Confirmed
- The beginner’s method consists of 7 steps (SolveTheCube (beginner tutorial site)).
- Two core algorithms (righty and lefty) are sufficient for the entire solve (Cubelelo (cubing equipment retailer)).
- The official Rubik’s guide and SolveTheCube both teach this method (Rubik’s Official (puzzle manufacturer)).
- The layer‑by‑layer approach is the standard for beginners (SpeedCube.us (cubing tutorial site)).
What’s unclear
- Exact number of moves per solve varies depending on solver speed and recognition – a range of 50‑70 moves is a typical estimate for a beginner solve.
What this means: while the method is standard, individual solve times can vary.
What the experts say
“The standard beginner method for a 3×3 Rubik’s Cube is the Layer‑by‑Layer (LBL) approach.”
— SpeedCube.us (cubing tutorial site)
“Rubik’s official solution guides are available for the 3×3 cube and other Rubik’s puzzles.”
— Rubik’s Official (puzzle manufacturer)
“A common beginner sequence is: first layer cross, first layer corners, second layer, third layer cross, and third layer corners.”
— SpeedCube.us (cubing tutorial site)
“When solving corners, you should turn the bottom layer and not rotate the whole cube.”
— YouTube tutorial (Best Method 2026)
The consensus among these sources is that the layer‑by‑layer approach with minimal algorithms is the recommended starting point for all beginners.
The path forward for new solvers
The beginner’s method turns an overwhelming puzzle into a repeatable process. With just two short algorithms and seven clear steps, anyone can achieve a solved cube in under ten minutes after a few practice sessions. For the casual learner, the decision is simple: invest an hour memorising the righty and lefty sequences, and you’ll never stare at a scrambled cube helplessly again. For the aspiring speedcuber, the method builds the foundational muscle memory that transitions smoothly into advanced CFOP – a single step that unlocks the next tier of the hobby.
Frequently asked questions
How do you solve a Rubik’s cube in 5 moves?
You cannot solve a fully scrambled cube in only 5 moves. God’s Number is 20, meaning the hardest scrambles require exactly 20 moves. A 5‑move solve only works for a cube that is only a few twists from solved.
How do you solve a Rubik’s cube in 10 moves?
Similarly, 10 moves is insufficient for a full scramble. The beginner method uses 50–70 moves. Very simple scrambles (like two or three twists) can be undone in 10 moves, but a random scramble cannot.
Is the Rubik’s cube solver app safe?
Most popular solver apps are safe, but always check permissions. Apps from official Rubik’s brand or recognised cubing communities are trustworthy. Avoid apps that request camera or contact access without reason.
How long does it take to learn to solve a Rubik’s cube?
Most beginners can learn the seven‑step method in one to two hours of focused practice. Fluency (solving in under 2 minutes) typically takes a week of daily practice.
What is the best Rubik’s cube for beginners?
A standard 3×3 Rubik’s brand speed cube or a budget friendly option like the QiYi Warrior W works well. Look for a cube that turns smoothly and has good corner cutting to reduce frustration.
How do I memorize the algorithms for a 3×3 cube?
Focus on muscle memory: repeat the righty algorithm R U R’ U’ ten times without looking. Then practice inserting corners on an unsolved cube. The repetition will make it automatic.
Can I solve a Rubik’s cube without algorithms?
Yes, but only by using intuitive methods or by following a guided steps process that effectively uses the same sequences. The core moves R U R’ U’ appear in nearly every method, so learning that one sequence is essentially unavoidable.
More related posts
 Shortest Day of the Year 2025 – Date, Time and Facts
 What is HTTPS? Meaning, Security Benefits & Why Use It
 Let This Grieving Soul Retire: Characters, Seasons, and Plot
 The Curse of Oak Island: Season 13 Update & Alex Lagina Injury
 How to Clean a Dishwasher: Vinegar, Filter & Deep Clean Guide
 Game of Thrones Episodes – Complete List and Watch Guide
 Matt and Nat Canada – Vegan Handbags from Montreal
 Tofu Général Tao Ricardo – Stovetop and Air Fryer Recipes
